Cement backer board is a crucial part of any shower installation. It provides a strong, moisture-resistant surface that supports tile and prevents damage from water. Using cement backer board ensures the shower walls stay sturdy and mold-free over time.
Not all backer boards are the same, as some offer better moisture resistance and durability. Popular options like HardieBacker and Durock are made to resist water and hold tile firmly, making them ideal for wet areas like showers.
Choosing the right backer board helps avoid costly repairs and keeps the shower looking good for years. Understanding the key features of different boards allows for a more confident and lasting installation.

Benefits of Cement Backer Board for Shower Applications
Cement backer board provides a strong, moisture-resistant base for shower walls. It supports tile adhesion while helping prevent water damage and mold growth. Its durability makes it ideal for wet environments where long-lasting protection is critical.
Waterproofing Performance
Cement backer board is highly water-resistant because it contains cement and sand, materials that do not absorb water easily. Unlike regular drywall, it won’t deteriorate or lose strength when exposed to moisture.
When properly installed with waterproof membranes or sealants, cement backer board forms a reliable barrier against water behind the tiles. This helps prevent leaks that can damage the shower structure.
Its ability to handle continuous moisture exposure reduces the chances of water seeping into walls. This makes it a preferred choice for wet areas like showers.
Mold and Mildew Resistance
Because cement backer board lacks organic material, it resists mold and mildew growth. This is important in showers, where moisture and warmth create favorable conditions for mold.
Using cement backer board lowers health risks linked to mold and keeps the shower environment cleaner. Mold resistance also means less need for frequent repairs or replacement due to mold damage.
Treatments and coatings can improve this resistance further, but even untreated cement backer board performs better than wood or drywall in wet areas.
Longevity and Durability
Cement backer board is strong and stable, supporting heavy tile installations without bending or crumbling. It holds its shape over time, even after repeated exposure to heat and water.
Its durability reduces the chance of cracking tiles or grout, which can result from unstable backer materials. This stability helps maintain the shower’s appearance and function longer.
Because it does not degrade like wood or gypsum-based products, cement backer board extends the life of shower walls and lowers maintenance needs.
Types of Cement Backer Board for Showers
Cement backer boards come in several types that differ mainly in weight, composition, and moisture resistance. Each type offers distinct benefits suited to various shower installation needs, moisture levels, and budget considerations. Understanding these differences helps select the right product for a durable, mold-resistant shower base.
Standard Cement Backer Board
Standard cement backer board is made from cement and reinforcing fibers. It is heavy, dense, and highly durable. This type is known for its excellent moisture resistance and provides a strong base for tile installation in wet areas like showers.
Common brands include Durock, HardiBacker, and Wonderboard. These boards can be cut with carbide-tipped blades and fastened with corrosion-resistant screws. They do not absorb water, which prevents mold and mildew growth behind the tiles.
Installation can be labor-intensive due to weight, but it ensures long-term stability under tile. It is also cheaper compared to lightweight and foam options, making it a popular choice for many professionals.
Lightweight Cement Boards
Lightweight cement boards use a similar cement and fiber mixture but with additives or different manufacturing methods to reduce weight. They are easier to handle and install because they weigh less than standard boards.
Despite the lighter weight, they maintain good moisture resistance and provide a solid tile substrate. These boards are less likely to sag over time, which helps protect tile integrity.
They are suitable for both wall and floor applications in showers but may cost slightly more than standard cement backer boards. This option is preferred where ease of installation and minimizing strain is important.
Foam-Cored Backer Boards
Foam-cored backer boards combine a foam core with a cement or fiberglass facing. This design provides high resistance to moisture and mold while being very lightweight. The foam core also offers some insulation properties.
These boards are often quicker and easier to install, requiring fewer fasteners and less effort carrying large sheets. They come in pre-sealed forms that reduce the need for waterproof membranes or extra sealing steps.
Brands like Wedi and Kerdi use this technology to create a waterproof shower substrate system. Foam-cored boards tend to be more expensive but provide enhanced moisture protection and speed up shower construction.
Installation Process for Cement Backer Board in Showers
Installing cement backer board requires careful preparation, precise cutting, secure fastening, and thorough sealing. Each step ensures the board stays durable and moisture-resistant, providing a solid base for tile.
Preparation and Planning
Before installation, the shower walls must be clean, dry, and free of any loose material. Removing old drywall or damaged surfaces is essential to avoid problems later. Measuring the wall height and width accurately helps calculate how many backer board sheets are needed.
It’s important to check that the wall studs are straight and spaced correctly, usually 16 inches apart. If needed, add blocking for extra support near corners or around plumbing. Planning should include selecting the right type of cement board, usually 1/2 inch thick, designed for wet areas to prevent mold and rot.
Cutting and Fitting the Board
Cement backer board comes in 3-foot by 5-foot sheets. It needs to be cut to fit the shower walls precisely. A utility knife or a carbide-tipped scoring tool scores the surface, followed by snapping the board along the score line. A jigsaw works well for cutting curves or notches.
Boards should be placed so that seams fall on wall studs, not in between. Leave a small gap, about 1/8 inch, between sheets and around edges to allow for expansion and apply waterproofing tape later. Dry fit each piece before fastening to ensure a proper fit.
Securing Backer Board to Wall Studs
Attach the backer board with corrosion-resistant cement board screws every 6 to 8 inches along studs. Screws should be driven flush with the board surface without breaking the paper facing.
Start from the bottom and work upward, fastening the entire sheet securely to prevent movement. Avoid over-tightening screws, which can damage the board. Screws must penetrate the studs by at least 1 inch to ensure a strong hold.
Sealing Joints and Fasteners
All joints between sheets require fiberglass mesh tape designed for cement board. Apply a thin layer of thin-set mortar beneath the tape and embed it firmly. Another layer of mortar goes over the tape to create a smooth, sealed seam.
Seal screw heads by covering them with thin-set mortar as well. This protects against moisture penetration. After the mortar dries, a waterproof membrane or liquid waterproofing should be applied over the entire surface to further block water before tiling.
Tiling Over Cement Backer Board
Tiling over cement backer board requires attention to the right materials and proper technique. Mortar must be correctly applied for strong adhesion. Tile selection should match shower conditions. The choice of grout and caulk affects water resistance and long-term durability.
Applying Thinset Mortar
Thinset mortar is the most reliable adhesive for tiles on cement backer board. It should be a cement-based mortar designed for wet areas to prevent failure in moisture exposure.
The mortar is usually spread with a notched trowel to create even ridges. This ensures good contact between the tile and the board. The ridges help the mortar to set firmly and prevent hollow spots underneath tiles.
Before applying mortar, the cement backer board surface must be clean and dry. Using modified thinset mortar can improve flexibility and bonding strength. It is important to follow the manufacturer’s instructions on mixing and application to avoid problems later.
Choosing Appropriate Tiles
Tiles for shower walls should be water-resistant and durable. Porcelain and ceramic tiles are common choices since they handle moisture well.
Tiles should be medium to small-sized, usually between 4×4 inches to 12×12 inches. Smaller tiles offer better grip and easier installation on uneven surfaces. Large tiles may require extra care for flat installation.
Matte or textured surfaces help reduce slipperiness when wet. Avoid natural stone tiles that need regular sealing unless the homeowner is prepared for maintenance. Glazed tiles provide additional moisture resistance.
Grout and Caulk Selection
Grout must be waterproof and mold-resistant to protect the tile installation. Epoxy grout is the best option for showers because it resists water and stains better than cement-based grout.
Cement-based grout requires sealing to reduce water penetration. Unsanded grout is used for joints less than 1/8 inch wide, while sanded grout is best for wider joints.
Caulk should be applied at corners and where the tile meets other surfaces to allow movement and prevent cracks. Use 100% silicone caulk for flexibility and water resistance.
Regular grout sealing and proper caulk maintenance extend the life of the tiled shower walls and prevent water damage.
Common Installation Mistakes and How to Avoid Them
Mistakes during cement backer board installation can cause water damage, weak walls, and peeling tiles. Proper waterproofing, fastening, and joint treatment are essential to ensure durability and prevent mold. Addressing these areas carefully helps create a solid and long-lasting shower surface.
Improper Waterproofing
Waterproofing is critical in shower installations. Cement backer board is moisture-resistant but not waterproof. It must be covered with a waterproof membrane or coating before tiling to stop water from reaching the framing and causing rot or mold.
Many installers skip or poorly apply the waterproof membrane. This can lead to moisture seeping behind the walls, damaging the structure over time. Membrane options include liquid waterproofing, sheet membranes, or waterproof backer boards with integrated barriers.
It’s important to:
- Avoid overlapping cement board inside the shower pan.
- Seal seams and corners with waterproof tape and thinset mortar.
- Check that the membrane completely covers the backer board with no gaps.
Without proper waterproofing, the shower won’t last.
Inadequate Fastening
Using the right fasteners in the correct way is vital. Cement backer boards must be secured tightly to framing with corrosion-resistant screws or nails designed for the board.
Common mistakes include:
- Using wrong screws or nails that rust or don’t hold firmly.
- Failing to fasten the boards every 8 inches on studs.
- Setting fasteners too deeply, breaking the board surface.
Incorrect fastening can cause the board to move or pop loose under tile weight, leading to cracks or wall failure. Installers should use fiber cement screws and avoid over-driving fasteners. Proper fastening keeps the shower walls strong and stable.
Incorrect Joint Treatment
Joints between cement boards must be treated carefully to prevent cracks and water damage. Simply butting boards together without treatment leaves weak points behind tiles.
Proper joint treatment involves:
- Leaving a small gap (1/8 inch) between boards for expansion.
- Filling joints with thinset mortar.
- Embedding waterproof fiberglass mesh tape into the thinset over seams.
Skipping these steps or using paper tape allows moisture infiltration and weakens tile adhesion. Well-treated joints create a smooth, flexible base that resists cracking and water damage over time.
Maintenance and Longevity of Cement Backer Board Showers
Cement backer boards are strong and water-resistant but need proper care to last. Routine checks, timely repairs, and attention to installation details help prevent water damage and extend durability.
Routine Inspection
Regularly checking the shower area is important. Look closely at seams and corners for cracks or gaps in the caulking or waterproof tape. Signs of mold, discoloration, or soft spots near the wall can indicate moisture problems behind the tile.
Inspect grout lines for damage, as cracks can let water seep into the backer board. If any sealant or caulk is worn or missing, it should be replaced promptly. Keeping these areas intact helps avoid water damage and mold growth.
Repairing Damaged Backer Board
If damage occurs, it depends on the extent. Small cracks around seams can be sealed with high-quality, mold-resistant acrylic caulk. Taping over minor seam issues with waterproof mesh and thin-set mortar restores water resistance.
For larger damaged sections or areas where the board is soft or crumbling, removal and replacement are necessary. This prevents ongoing moisture damage to studs or subfloors. Always make sure the new board is sealed carefully at joints before tiling.
Long-Term Performance Considerations
Proper installation impacts how long cement backer boards last. Using waterproof membranes and thoroughly sealing edges extends the lifespan. Typically, well-maintained cement backer board lasts 10 to 30 years.
High humidity and constant water exposure make sealing critical. Regular maintenance of grout and caulk, plus replacing any damaged sections immediately, help keep showers leak-free. Choosing moisture-resistant backer board types also improves long-term durability.
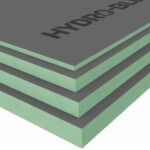
Why Consider HYDRO-BLOK for Shower Installations
While cement backer boards are reliable, they aren’t fully waterproof on their own. They still need membranes, coatings, or extra steps to ensure long-term water protection. That’s where HYDRO-BLOK stands out.
Built-In Waterproofing
HYDRO-BLOK panels use a foam core with a waterproof cementitious coating, making them both lightweight and 100% waterproof straight out of the box. This eliminates the need for additional waterproofing layers, simplifying installation while reducing labor and material costs.
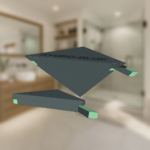
Facilidad de instalación
Unlike heavy cement backer boards, HYDRO-BLOK is lightweight and easier to cut, carry, and fasten. Installers can complete projects more quickly with fewer tools, making it a practical choice for both professionals and homeowners.
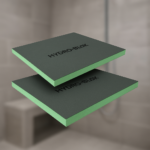
Durability and Resistance
HYDRO-BLOK is highly resistant to mold, mildew, and warping. Its structure provides long-term stability while also offering thermal insulation benefits. This ensures showers stay durable and low-maintenance for years to come.
Wrapping It Up
Cement backer board has long been the go-to choice for shower durability, but modern solutions are changing the game. While it delivers strength and moisture resistance, it still requires added steps to ensure full waterproofing. HYDRO-BLOK eliminates that extra hassle by providing a lightweight, fully waterproof, and easy-to-install alternative.
For homeowners and contractors who want long-lasting protection with less complexity, HYDRO-BLOK is the smarter investment. It blends the reliability of traditional cement boards with the convenience and innovation of next-gen waterproofing technology—making it the clear choice for today’s shower installations.
Ready to upgrade your next shower project with a faster, more reliable waterproofing system? Contact HYDRO-BLOK today to learn more, request a quote, or find a dealer near you.


Comparte este artículo
Elija su plataforma: